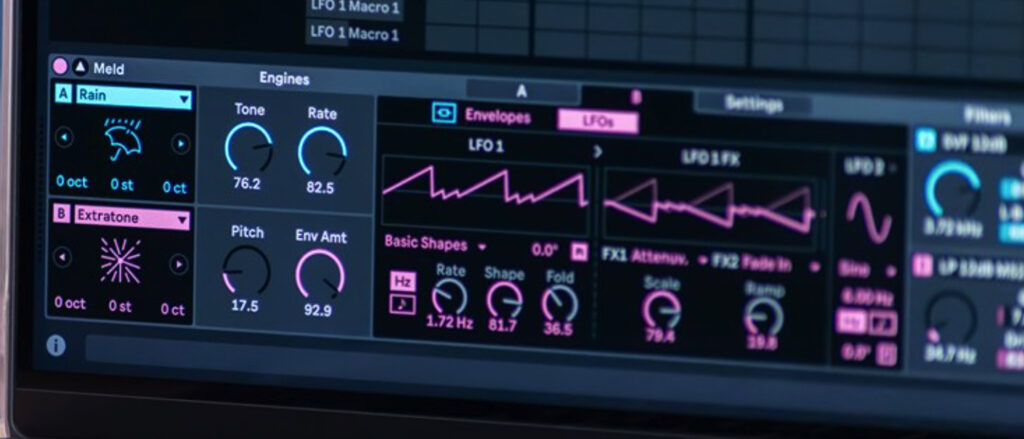
Ever wonder how producers get those wobbling basslines, pulsing pads, or subtle, evolving textures in their tracks? The secret sauce is often an LFO (Low-Frequency Oscillator). LFOs are one of the most powerful tools in sound design, and once you get the hang of them, your tracks will start moving in ways you didn’t know were possible. Let’s break down how to use LFOs, especially to modulate filter cutoff, and get you creating those wavy, rhythmic effects.
What Even is an LFO?
Think of an LFO like a wave that slowly (or quickly) moves up and down. Instead of creating sound directly, it controls things for you—like the pitch, volume, or filter cutoff, and even stereo panning. It’s like having a little invisible hand constantly turning knobs while you focus on the fun stuff.
Oh, and here’s a cool thing – LFOs don’t just exist in synths. In DAWs like Ableton Live, you can find LFO tools directly in the audio effects section. This means you can apply modulation to any parameter on your track – reverb, delay, EQ, or even other effects. This opens up endless possibilities for adding motion across your entire track, not just individual instruments.
Routing an LFO to Modulate Filter Cutoff (Step by Step)
1. Find the LFO Section
If you’re using a synth, head to the LFO section (often labeled LFO 1, 2, etc.). For DAWs like Ableton, simply load the LFOfrom the audio effects rack. This effect can map to almost any parameter on your track.
2. Locate the Filter
Locate your synth’s filter section or add a filter plugin to your track. The cutoff knob controls how much of the high frequencies pass through. When an LFO modulates this, it creates those signature sweeping or wobbling effects.
3. Connect the LFO
Here’s where the magic happens. Depending on your synth or DAW, there are a few ways to route the LFO:
- Synth Modulation Matrix: If your synth has a modulation matrix, open it up. Select LFO 1 as the source and Filter Cutoff as the destination. Adjust the amount to control how much the cutoff changes.
- Drag-and-Drop (Easy Mode): Some synths (like Serum) let you simply click and drag the LFO and drop it on the cutoff knob. Easy as that. Adjust the modulation amount by dragging the cutoff up and down while the LFO is assigned.
- Ableton LFO Mapping: In Ableton, apply the LFO effect, click Map, and select the cutoff knob (or any effect parameter). Adjust the modulation depth and rate to shape the movement.
4. Shape the LFO
Now that the LFO is connected, it’s time to shape it:
- Waveform: Sine waves are smooth, square waves are choppy, and triangle waves are somewhere in between. Experiment!
- Rate: Controls how fast the LFO oscillates. Slow rates give long, evolving sweeps, while faster rates create rhythmic pulsations.
- Sync to Tempo: Want the LFO to pulse in time with your track? Sync it to your DAW’s tempo and choose divisions like 1/4 or 1/8 for rhythmic patterns.
- Phase/Offset: This changes where the LFO starts in its cycle, letting you tweak the feel.

8 Tips to Use LFOs for Sound Design
- Filter Cutoff Modulation: For sweeping and wobbling sounds. Try square waves for choppy effects or sine waves for smooth sweeps.
- Pitch Modulation: For vibrato or siren effect. Try using low-depth modulation for subtle vibrato or crank it up for siren-like effects.
- Amplitude Modulation: For pulsing volume effects, like tremolo. Sync the LFO to your DAW’s tempo for rhythmic tremolo patterns.
- Wavetable Position/Shape Modulation: Use slow LFOs for evolving pads and fast LFOs for glitchy, complex textures.
- Panning Modulation (Stereo Movement): Great for creating wide, immersive pads or leads that move in the stereo field.
- Reverb/Delay Modulation: Modulates reverb size, delay feedback, or time for evolving spatial effects. Subtle modulations can make reverb shimmer and delay trails more dynamic.
- Rhythmic Modulation (Tempo Synced LFOs): For creating rhythmic patterns that evolve with the beat. Use square or saw waves for harder modulation, perfect for breakcore or techno.
- Layering LFOs for Complex Movement: Use one LFO to modulate another for evolving, unpredictable patterns. Experiment with different rates for sequential rhythmic textures.
Final Thoughts
LFOs are your secret weapon for making sounds breathe, pulse, and evolve. Whether inside a synth or through audio effects in Ableton, modulating filters, pitch, reverb, or even panning creates endless creative possibilities. Start with simple filter sweeps and gradually explore more complex routing to bring your tracks to life. The best part? There’s no right or wrong way to this. Just keep experimenting and let the movement guide your sound.

Leave a Reply